Nos membres - Our peeps

Monday, November 30, 2009

Happy Holidays Card

It's that time of year again. Your card tutorial is
this lovely shape. Using the a Artistic Scroll template from the Maya Road
I cut the shape out of white cardstock and traced it onto
a folded sheet from Cosmo Cricket-Jolly by Golly Paper Pack.
Then I use another sheet of choice and cut a piece that measured out
5 1/8 inches long by 2 1/8 inches wide. Be sure to
ink your edges of all your pieces. Next I cut a piece measuring
7 inches long by 1 1/8 inches wide. Use your Fiskars
threading water punch and punch one edge. Be sure to ink
the edges. Using twine I criss crossed and tied a bow.
Adding finishing touches: I used a Heidi Swapp Ghost
Snowflake, a cardstock sticker from the Cosmo Cricket and mini
white brad with a Martha Stewart Snowflake punch.
♥*♥*♥*♥*♥*♥
Thanks for coming by and we hope you come back over
and over again. Tomorrow is our new Card Sketch Challenge so
stay tune for that.
♥Dawn♥

Supplies:
Heidi Swapp Ghost Snowflake
Paper Studio Mini White brad

Sunday, November 29, 2009

Peace, Joy & Love Card

Hi everyone! Hope you've all enjoyed the weekend so far, especially Thanksgiving weekend for our friends in the US!

Today, I've got a card made up totally by accident! I did in fact mess up my original plans for it, and sort of randomly came to this!

I really wanted to use this super rad looking cutting file (card_2277) pictured on the left from my Quickutz Silhouette digital library.

I had so many ideas storming through my head for the semi-circle part of the card and then I'm not sure what happened *wink, wink* but I ended up with this instead!


Sometimes, we make mistakes in the crafting world and at the end we sure find ways to fix them, right?! *hugs & kisses*

Nini :P

Supplies used:

Saturday, November 28, 2009

Snowflake Fun


Soon it will be that time of year, snowflakes will be falling everywhere you go! As for me I don't mind the snow, but hate to drive in it!

I did however find a couple of snowflakes that I don't mind, I picked up three wooden snowflakes at the dollar store. I saw them on the shelf and thought to myself... PROJECT!!!

So here is what I did to spice up these plain wooden flakes!

Step 1: I started by picking out some pattern paper. I used the Basic Grey Eskimo Kisses line. I am using 3 different pattern papers, but you could use all 3 the same. You need to trace your snowflakes on to the paper then cut them out. They dont have to be cut exactlly to fit.

Step 2: Adhere your paper to the flakes. I used mod podge. You can just dip a foam brush in the mod podge and paint it on your wood then place your paper on top. Make sure you allow enough time for it to dry.

Step 3: File all the edges down. I used the Basic Grey filling tool set for this. It worked great because there are many different sizes of files in there to get in and around the corners of the flakes.

Step 4: Sparkle time.....I put stickles all over all 3 snowflakes. They now have that sparkle that a fresh blanket of snow has. I allowed this to dry overnight.

Step 5: I used a hot glue gun to attach the 3 snowflakes together. I just attached them at the edge.

Step 6: Grab all your goodies from your room and decorate. I added a couple of buttons, ribbon and some stickers to spell out the word SNOW. You may want to use glue dots or super sticky tape. With the stickles on there regular adhesive had a problem sticking.

Step 7: Last but not least, I tied ribbon around part of the snowflakes on the outside to turn it into something to hang on the wall, or a door. Now your done and your have a fun winter hanging.

Hope you've enjoyed today's quick and easy festive project, until next week!

Stacy

Friday, November 27, 2009

Christmas Project Ideas Using Scraps

Hi girls!

How are you?

As promised in my last post I began making layouts and home decor projects for Christmas.

I inspired myself by listening to Christmas songs! (Even thou' there's no snow yet!).

Below is my lil' work shop of holiday projects!


I noticed that I had a big box full of scrap paper. I love to use many styles/designs of papers/cardstock on a single layout, and I hate throwing scraps away so I keep them for future projects.

For this week I will show you how to make some Christmas trees using the papers I've already used in my past layouts. Do you recognize these papers?


To make the tree I made a cone with a sheets of white cardstock, then I grabbed a bunch of scrap/scratch paper that I thought would coordinated well and I cut those to 3/8" by 1.5". To make the "curl" I just rolled my paper against a big marker!

Sticking your curled up pieces onto the cone is tricky, it's best start from the end-up!

You could always add some glitter, pearls, bling or ribbons, but I wanted a clean and simple tree!

Next week I'll show you how I made the others holiday decor pictured!

Take care and until next week!

Kim @ KLDezign

Tuesday, November 24, 2009

Cricut Tuesdays with Michelle

Happy Tuesday everyone!

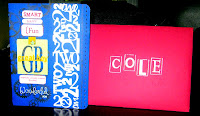
This week we will be focusing on cards as my family just celebrated my Son's 2nd Birthday! My intention was to make the biggest card ever on my Cricut (with matching envelope of course) and create a super easy card ready in mere moments.

Well to be honest the card is not as big as I had anticipated and when making the card I used alot of simple elements however I layered so much therefore the assembly took longer than I planned. In the end though my Husband and I were so pleased with the results; this card was the talk amongst all the family over dinner.

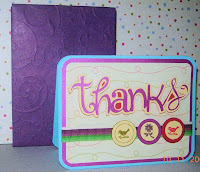
The second card I created is a Thanks card to acknowledge the wonderful gesture and gifts my Son received (more like spoiled) from our family and friends.

I used 2 cartridges for these projects: Beyond Birthdays & Graphically Speaking. If you have not already own these cartridges; may I suggest that you do.

Here's why...

First, Beyond Birthdays is chock full of useful and everyday sentiments to cover off most occasions plus there are icons to go along with each sentiment that can be layered. And speaking of layering this cartridge has all the 3 creative features (IMHO) to make layering easy yet stand-out on your projects whether it be a card or a scrapbook page.

These 3 creative features I am referring to are: standard, shadow and shadow blackout.

Let me briefly explain the difference:
  • Standard: the set image as is when you press its key (same between non-shift & shift keys).
  • Shadow: the Standard image designed slightly larger creating a 'shadow' when you nestle the standard cut image on top of this type of cut.
  • Shadow Blackout: the Shadow image designed with filled in spaces creating a blackout effect.
This cut will nest exactly with its corresponding Standard creative feature layering on top. When using all 3 creative features in this manner makes any die-cut pop off a project even when using basic, plain cardstock. Plus having 2 different card designs (square and rectangle) standard to any cardmaking project these days with coordinating envelopes; you will be set to create any card quick and easy!

Secondly I personally adore the Graphically Speaking cartridge and used it for my Son's Birthday card is because of the numeric graphics as well as the versatility of its captions and quotes. This card is filled with with so many of those options plus a variety of shapes and icons that you can easily mix and match to your hearts content. And when you can mix and match your die-cut elements; the possibilities are endless!

Now keeping all that in mind, here's how to re-create these cards to suit your occasion.

Birthday Card:

Ensure your settings are set to '24' (aka mat size 12 x 24) on your Cricut machine. How to do this is to press the Settings button and push OK until you reach the Mat Size option. Once you reach that option, use your arrow key to change the mat size then press Settings to exit. You will now have to turn off your Cricut machine and turn it back on to reset the mat size (wait a few seconds in between). You can tell if you are successful when your mat size icon (located on the bottom left of the LCD screen) shows '24'. If not, repeat the above steps and try again.
  • Insert a 12 x 24 sheet of cardstock into your Cricut.
  • Press your Fit to Page button on.
  • Select your envelope shape as desired (my card I chose the rectangle envelope option).
  • Press Cut. Remember the size your Cricut machine will cut at as you will use this same size to cut your coordinating card at.
As you may know I am a huge advocate in creating your envelopes first when making them with your Cricut. Why? To ensure the best possible fit without error! It is the best tip I can give to any cardmaker when creating your envelopes and cards from a piece of cardstock in any size. Make your envelopes first!
  • Once your envelope has finished cutting; insert your 12 x12 cardstock into the machine and press the coordinating card to the envelope shape previously chosen.
  • Ensure your Fit to Page button is off.
  • Re-adjust your size to the number memorized from step #5. Then press Cut.
  • Score, fold (and adhere where necessary certain folds) your envelope and card.
Using the Graphically Speaking cartridge:
  • Set your size dial at 3-1/2". Cut the 'GB tag' (Image14).
  • Cut the 'great boy with fastener' (Imag14-s) in another color piece of cardstock/paper.Layer and adhere pieces together.
  • Cut the '2' numeric graphic (Image42) using the Fit to Length button. Adjust size dial to 8-3/4" prior to.
  • (optional) Border punch the cardfront opening as desired for a decorative touch and interest.
  • (optional) Decorate your cardfront, stamp images that suit the occasion as desired. This can be a mix of words and/or shapes.
  • Adhere your cut pieces as desired onto your cardfront.
  • Heat emboss a greeting to the recipient (optional) or use white StazOn ink or white Pigment Ink - use whatever you have on hand. For my project I used white embossing powder.
That's it! Your card is complete. One of the stamp images I used was a stitching effect (along the punched border of the card). This is great way to add texture and interest instantly. You can find the stamp image I used on the Sassafras Stitchery Stamp Set here. Sassafras stamps are one of the best out there - amazing quality, great value for the buy!

Now onto the next card creation. Now because I has to mass produce these; I chose a to use a simple design using as many colors and textures as possible to achieve that WOW factor. I hope you will agree. For this card I used cardstock that has a pearl sheen to it. These stacks are from DCWV and there are two here I highly recommend, Hippie Chic and All About Girls.

Now let's get started...

Thanks card:
  • Take a 8-1/2 x 11" cardstock and cut in half. Score each card in half creating a standard A2 size card.
  • Cut a piece of solid cardstock to 5-1/4 x 4". Set aside.
  • Cut a piece of patterned paper to 5 x 3-3/4". Set aside.
  • Using the Beyond Birthdays cartridge; cut the word 'Thanks' using all three creative features.
  • Set your Fit to Length button on with your size dial set at 3-1/2". Press cut using the Shadow Blackout creative feature first. Remember the number the cut will be set at.
  • Turn off your Fit to Length button and cut the remaining layers with the other two creative features. Layer and adhere all pieces together. Set aside. Choose papers that coordinate with your patterned paper for a cohesive look.
  • Adhere the cardstock pieces cut from steps #2 & #3 together and layer a piece of ribbon on top.
  • Adhere 'Thanks' onto the card as desired (optional, use 3-D dimensionals to adhere).
  • (optional) Stamp images onto cardstock and adhere them onto cardfront as desired. For my card I used small images and then a circle punch to ensure I got the same cut shapes each time. Yes it is okay to use punches with your Cricut designs. The Cricut Police will not come after you, ha!
This card is now complete!

I hope you enjoyed these two card projects this week. Don't forget to enter the Posh Designs Card Sketch Challenge Contest. This is week #2 and there is a fabulous prize to be won!

Next week I will show you an interesting way to use metal onto your card projects. It may not be what you think and it may lead you to see this ordinary object in a whole new light.

Until next week... Happy Crafting!

Michelle

Monday, November 23, 2009

Nook and Pantry and Everyday Moments


Basic Grey's Nook and Pantry line was one of my absolute favorites from this past CHA. I love the colors, the vintage look and the homey patterns. I thought my first project with this line might be a recipe book, but as I flipped through the papers and elements I realized this is the perfect everyday line too.

I love capturing the everyday moments and let's face it, lots of them happen in the kitchen. So for this layout I chose a picture of my daughter on a Sunday morning and journaled about how we love to make a big breakfast on Sundays.

The multicolor polka dot patterned paper mimicked my daughter's pajamas. The brown script letters are so fun and come with the patterned paper pack. I found a cute chipboard shape that had a picture of eggs and loved adding the yellow scalloped sticker (also from the paper pack) rather than searching for coordinating ribbon. I also added a few buttons to the title. I love the Basic Grey buttons because the colors coordinate with their papers and they come in several sizes and opaque and see through versions in each pack. I also bought the Cup of Tea stamp set and as soon as I saw the mini spoon I thought it would make a great border. I paired it with the "yum" sentiment and stamped it in brown along the bottom.

For me, this is the easiest Basic Grey line to work with so far and I can see using it for many more everyday layouts. Head on over to the Posh Designs Scrapbook Store for all your Nook and Pantry goodies and start documenting your everyday moments today.

:) Rebecca

Friday, November 20, 2009

Happy Birthday Card

For this birthday card I used SEI Oasis paper packet from Posh Designs Scrapbook Store. And a square scalloped template from Maya Road along with a couple of flowers layered together.

Start off with a 5 inch by 5 inch size card base. Ink the edges with black ink. Using the square scalloped template print onto a piece of pattern paper and cut out. Use only half of the scalloped square and ink the edges.

Print out your sentiment as well on a piece of white cardstock. Ink the edges. With another piece of pattern paper cut out a piece that is 4 1/2 inches by 4 1/2 inches, ink the edges and adhere to you card base.

Place your scalloped piece of pattern paper to the left side like shown. Then place your sentiment like shown in the photo of my card.

Take your layered flower and place it upper left hand corner of your sentiment.

I hope you've enjoyed this card tutorial for today.

♥~Dawn~♥

Supplies: White Cardstock, SEI Oasis Papers, Stazon Jet Black Ink, Flowers, misc. paper, Paper Studio String of Pearls

Thursday, November 19, 2009

Thursdays with Kim ~ "Fall, Last chance!"

Hi girls! How are you?

This week I'll be showing you some layouts that I have made a couple of weeks ago, they are my last layouts of fall photos.

Yes, and soon I'll begin to scrap my winter pictures!

How fun will it be with Basic Grey's new Eskimo Kisses paper line! I can't wait to begin!

This first layout is done with the Granola paper line from Basic Grey. I really liked to work with these paper because they fit so well with the leaves on my picture!

I've notice that recently my layout contain many raw embelishments, some non-altered chipboard or simply white paper for the background.

It's a little sad because on my layout we don't see as much of the transparent overlay I made using Ranger's alcohol ink.

So here's my first layout for this post it's call Petit Plaisir (Little Fun).

The second one I've made was a challenge for me because I don't often use mosaic. But I realize that even if the picture is not at his "normal full size" We can understand the subjet and it gave the layout dynamism.

I use the paper line Indian Summer from Basic Grey (I know I'm a total addict to theses collections!)

I used some rub-ons to make my leaves, I put them on a cardstock and I cut around them and then placed them on my layout with some 3d pop-up dots.

I'm really glad of the result. My layout is call Joie (Joy).

Thanks a lot girls for reading my post and take care, until the next week!

Hugs and kisses!

Kim @ KLDezign

Life Is Bliss!

I adore the new Crate Paper Bliss Collection! The colors are beautiful and the designs of the patterned papers are just too cute! This layout is of our neighbor's dog. Quite the cutie, dont you think?! :)

I started off with a 12x12 piece of kraft cardstock. I then cut the Mod patterned paper into a 9.5 x 10 inch piece. I adhered this onto the kraft cardstock.

I then cut the Lucky patterned paper into a 6 1/2 x 1 inch piece. I cut another piece of the Mod patterned paper into a 7 x 1 inch piece. I adhered the patterned paper strips and placed my picture on top of them.

I added Crate Bliss Rub-ons and a super cute American Crafts Journaling Sticker. I also added an American Crafts Accent Sticker (brown flower).

Finally, I inked the edges of the Mod patterned paper with white chalk ink. I also distressed the edges with my fingernail.

Be sure to check out all the NEW Crate Collections in the Posh store!!!

Kristen

Wednesday, November 18, 2009

WINNER of PDSS Sketch #1

And the winner of PDSS Sketch #1 and using Random.org is....

# 2 Debs

Congratulations Debs! Please email Nini and she will get that prize to you as soon as possible. You need to make sure you get in touch with her by the Saturday. Or you will forfeit the prize and another winner will be chosen. So do hurry.

Thanks to everyone who participated in our very first challenge. We hope you all come back and try our new challenge.

Tuesday, November 17, 2009

Win your Wish List Contest *EDITED*

The holidays are just around the corner and that means 'tis the season for giving! Why not start with yourself? After all, you know exactly what you want!

Don't be fooled by all that "it's better to give than receive" humbug. We want to help you treat yourself! That's why this holiday season we're giving you a chance to win $100 worth of scrappy goodies on your wish list.

Starting on 12/2, we'll draw a winner every week and post the name by Friday to receive $100 worth of merchandise from his/her wish list.

The last winner will be drawn on 12/23, for a total of 4 winners.

There are just a few catches!

  • If you're selected and only have $50 worth of stuff on your wish list, you'll only get $50 worth of merchandise. Don't miss out by making sure you've got at least $100 worth of goods on your list!
  • If your wish list total is more than $100, you get to pick out the stuff you want from your list.
  • On the day of each drawing, the winner's wish list is locked. That means once a name is drawn, the winner gets to pick from his/her wish list as it is at that moment. If you aren't selected that week, feel free to add more items until the next week's drawing!
  • Gift cards not included.
  • Remember adding items to your Wish List does not reserve them!
  • One Entry per person per email per mailing address in your Wish List/Registry.
  • Open only to legal residents of Canada & USA 18 years and older as of date of entry.

So start shopping and update your wish list with lots of merchandise now!

One Grand Prize Winner Every Week Will Get:

Up to $100 Worth of Merchandise from Your PoshScrapbookStore.com Wish List!


The rest is up to you, so enter for your chance to win! Hurry on and don't forget to spread the word!

CREATE
your Wish List now or LOGIN to your existing Wish List

Cricut Tuesdays with Michelle


Hi Everyone and welcome to another Cricut Tuesday edition where this week I will be discussing how to mass produce cards with coordinated envelopes!

With Christmas almost on our doorstep I realized that I needed to get a big jump on creating cards for my husband's management team, extended family, friends, co-workers, the list goes on and on it seems...

In my case I need to mass produce over 100 cards with envelopes. So with my handy Cricut always in tow here are my tips and tricks to help you ease into your holiday cardmaking process.

This is a sample photo of the cards I created (appox 6 of each) in just over a week.


1) Take a 12 x 12 piece of patterned paper and cut into 6 -4 x 6" rectangles. Trim each rectangle to a 3-1/2 x 6" rectangle afterwards. Set aside.

2) Take a 12 x 12 piece of white or cream plain cardstock and cut into the 6 - 4 x 6 rectangles. Trim each piece afterwards to 3-3/4 x 6 " rectangle. Set aside.

3) Take another 12 x 12 piece of cardstock (can be textured or plain) and trim into strips of 4 x 12 rectangles. Score each card in half. Each card should measure 4 x 6" and should have created 3 cards from 1 piece of 12 x 12 cardstock. For my holidays cards, the color I chose of the main card base was taken from the color in majority of my patterned paper.

4) Take a piece of 6 x 12" cardstock and cut into strips of 1-1/2 x 4". Set aside. For the purpose of my holiday cards I chose the color of this piece of cardstock to coordinate. You should be able to cut 6 strips from this one piece of 6 x 12" cardstock.

5) Border punch as desired along the opening of the card. If you choose to follow this step, ensure all your cardstock pieces created in steps 1 & 2 are trimmed back at least 1/2" so that your border punch does not cut into all those layers of paper/cardstock. It may cause to jam the punch.

6) You may round your corners on your card bases and/or card layers. If you choose to do this, may I recommend the WRMK Corner Chomper Tool. This amazing lil' punch cuts through layers of papers and cardstock like butter! This tool has been a lifesaver and has become one of my recent favorites. You can find out more about it here.

7) Layer your larger cardstock pieces (from steps 1 & 2) onto your card base created in step 3. Layers should follow as: card base - white or cream piece of cardstock then patterned paper on top.

8) Take your smaller strips of cardstock cut from step #4 and emboss then distress to show the beautiful embossed pattern (completely optional, see photo below). In this case I chose white core cardstock however another beautiful option is are the Core'dinations cardstock packs found here which can add beautiful color. In my humble opinion Core'dinations cardstock is fabulous stuff! Okay moving on... Once you have embossed and distress each of the strips, layer them against the border punch trim on the card base.

9) Take a piece of ribbon and adhere along the seam of the cardstock strip to give the base a more finished look.

Now we get to the fun Cricut stuff... Using Beyond Birthdays cartridge I chose the following sayings, 'Season's Greetings', 'Create Joy' and 'Happy Holidays'. Why? Because all these images are attached and linked meaning that one cut is all it takes no matter which creative feature you choose. Also you will notice that I used all 3 creative features for each greeting - standard, shadow and shadow blackout. This is because it would pop against the patterned paper as well as make the sentiment standout on the card itself. Now if you know me by now I am all about easy peasy and because the way the cards were created you will be able to maximize minimal 12 x12 pieces of cardstock or if you have the 12 x 24 pieces of cardstock this would be a great opportunity to use them. So how you ask?

Follow me...

10) Ensure your Fit to Length button is on. Turn dial to 4-1/2 (to ensure the sentiment is centered on the card base). Insert paper. Select the Shadow Blackout creative feature 1st (because it cuts the biggest and is the bottom layer of the sentiment). Then select your sentiment. Press Cut. Your Cricut machine will then calculate how tall the image will cut. Remember that size!

11) Once that first cut is completed. Turn off your Fit to Length button off. Turn on your Quantity button. Choose in your settings how many of that one sentiment you need. Switch your size dial to the number shown in step 9. Press Cut. The Cricut machine will now work its magic calculating each time the image has been cut. So if you need to insert more paper; do not touch your dials or keypad - nothing. Just insert paper and press cut. That's all. In fact touching your keypad or machine after a cut has been complete may delete or alter your current work.

12) Cut each remaining layer of the same sentiment using the other 2 creative features. All you need to do is press which feature you want on the keypad. You do not need to switch buttons on and off or adjust any dials. You've done that work already in steps 9 & 10. How easy is that eh?

13) Once all your sentiment layers are finished cutting. Layer and adhere all the pieces together and place them onto your card base. I chose to use dimensionals adhere my sentiment onto each card to add some interest (as you will see in the photo below).
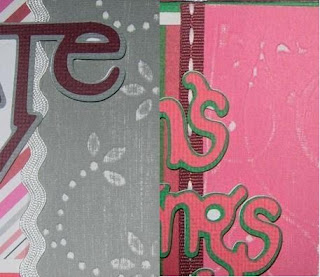
Voila your cards are now complete!

To create the envelopes you can use patterned paper or cardstock (just remember to adjust your pressure and depth dials accordingly). You will also be using the Beyond Birthdays cartridge to keep things simple.

*Note: 1 - 12 x 12 sheet = 1 envelope & 1 - 12 x 24 sheet = 2 envelopes

1) Select the 'rectenvl' (it is a shift key) image.

2) Set size dial to 8-1/2".

3) Press Cut.

4) (optional) Emboss and border punch the envelope opening after you have scored and folded
each envelope. I chose to coordinate the emboss pattern and border punch that was used on the
card.

5) (optional) If you are mailing these cards you may want to use glue tape of some sort to ensure a proper seal when closing the envelope.

Now you are finished! My best piece of advice to accomplish a mass number of cards is to take one task at a time. Maybe one step one day or for one week and so forth... The Cricut machine will be your lifesaver when it comes to your sentiments and envelopes; it sure was for me.

Have fun creating your holiday cards. I hope to see some in the gallery really soon! Until next week... Happy Crafting!

Michelle

PDSS Bi-Wkly Card Challenge ~ Sketch #2

~For newer posts please scroll down.~
♥~♥~♥~♥
PDSS Sketch #2 is provided by Nini.
We would also like to see bling (anything sparkly)
and stitching (any kind) on your creations.
These challenges will be on a
bi-weekly basis. So that means you will have
two (2) weeks to get your creations completed, loaded and linked up.


Here's what's being offered to one random winner of the challenge. All you have to do is participate by creating anything with the sketch in mind. Post in Mr. Linky below by typing your name and leaving a direct link to your creations.
♥~♥~♥~♥
You can find this stamp here.

Racquel

Racquel's second card


Rebecca

Deadline: November 30th 11:59 pm EST.
Link us up using Mr. Linky. Type your name and place a direct link to your creations.
Thank you!
PDSS Design Team

Sunday, November 15, 2009

Envelope Album ~ Tutorial

I love making these albums!!!
They take a little time, but the end result is always worth it!

STEPS:
To create this album, you will have to make two templates. First take a medium sized envelope and open it up to create the first template. I use a 5.5x7 envelope, but you can use whatever size you choose. Trace your template onto a piece of double sided cardstock and cut it out. I used paper from Sasafrass Lass' Bungle Jungle Collection. Use a scoring tool and a ruler to recreate the envelope's score lines. This will be your INNER envelope.

For the OUTER envelope, take original envelope and lay it onto a piece of cardstock. Using the envelope as a guide, trace another envelope that is about 1/4 - 1/2 an inch larger than the original. Once you cut it out, add your score lines just as you did with the inner envelope.

To make the accordion album, cut a rectangular piece of cardstock that you can fold into three equal parts. The size of your album will vary depending on the size of you envelope; I used a 4x12 piece. Score and fold to create the accordion album. Cut and adhere a mat for each section of the accordion album, then add your photos.

After you add your photos and embellishments, adhere the accordion album to the inner envelope, and then adhere the inner envelope to the outer envelope. You can use Velcro to keep your album closed.

Optional: Add a cute embellishment to the closure that hints at the theme of your album :)

TIP: To fold: Close the inner envelope first by folding the sides, bottom and then the top in that order. Repeat the same order the fold the outer envelope.


I hope you'll give this project a try! Thanks for looking!

Racquel

Saturday, November 14, 2009

Revamped Christmas Card


Good Morning to you-all!!!

Today, I decided to try out something new, a Holiday card that's a little bit out of my "Seasonal" comfort zone. When I think of Christmas, I'd usually think of the traditional colors and patterns which we are most likely to use such as deep greens, reds, and golden tones.

The paper that I used for this card was taken from Cosmo Cricket's Jolly by Golly Paper Crafting Kit, if these sheets weren't labeled "Jolly by Golly", I would have never imagined to use these fun and funky colors for my upcoming Christmas projects!

So, I decided to ditch the traditional Christmas card and re-vamp it! I used a bold colorful striped patterned paper and accented it with black hearts instead of the typical Christmas ornaments; I then embellished the edges with faux stitching using Ranger Ink's Inkssentials White Pen, a Christmas-inspired chipboard sentiment and the finishing touch, a coordinating ribbon and voilà!

A non-traditional, clean and simple holiday card ready for gift giving!

Now, I challenge you to try and re-vamp this year's holiday crafting by trying out something different, I'm sure you'll be amazed by the results!

Hope you've enjoyed today's project, have a great weekend everyone!!!

Friday, November 13, 2009

Holiday Blessings


Christmas is just round the corner. So today I'm going to sharing a non-traditional Christmas card with you. Threading Water and Snowflake punches were used on this card.

Using Bazzill Kraft Cardstock measure a piece that is 5 inches wide and 10 inches long. Fold in half. Take the Treading Water punch and start at the fold, punch both sides of the front of your card. Ink and distress all your card edges.

Grab about three scrap pieces of pattern paper that should be no smaller then 5 inches long. On this card I used Basic Grey's Eva Collection that can be found at Posh Designs Scrapbook Store.

Use the Treading Water punch and one piece of pattern paper measuring 1 3/4 inches wide by 5 inches long punch one edge. Adhere on the left side of your card. Take another scrap piece of pattern paper that measures out 1 3/4 inches wide by 5 inches long adhere right behind the hole punches left by the Treading Water punch.

Cut another piece of pattern paper that should measure about 5 inches long by 1 1/2 inches wide. Stamp your choice of sentiment to the rightside of this piece. I used white ink for this. Adhere by weaving under (yellow piece show in picture) and lining it up with the back of the card.

Using your snowflake punch, punch out three snowflake in a different pattern paper. Grab a ghost snowflake or even make your own adhere down. Using mini pink brads adhere you punched out snowflakes like shown in photo.

I hope you've enjoy this tuturial for making this card. Have fun crafting your next card.

~♥Dawn♥~

Supplies used: Bazzill Kraft Cardstock, Fiskars Treading Water punch, Martha Steward Snowflake punch, Basic Grey~Eva Collection Papers, Heidi Swapp Ghost Snowflake, Paper Studio Mini Brads (pink), Hot Off the Press Christmas words, Stazon White Ink, Tim Holtz Tea Dye Distress Ink

Thursday, November 12, 2009

Thursday With Kim - Circular Cards

Hi everyone! How are you?

This week I want to show you some circle shaped cards. I made this card using Ranger's Distress Inks, they are one of my favorite products to use! This time I've used them in a different way; I inked wax paper in Antique Linen and Walnut Stain and sprayed it with water using Ranger's Mini-Mister.

This type of ink reacts well with water and gives great inking effects. I then placed my paper onto the wet ink. Which gave it a coffee-like stain effect on the card. With this adorable Inkadinkadoo stamp and cute ribbon, this card is great for any occasion!

The second card isn't "really" a circle, It's a scallop card template I made for my cricut I wanted to try it out before adding the file to my blog.

I embossed my card with Sizzix Texture Boutique Embossing Machine, I then added some chalk onto my card just to give it a little color. It's easier to see on the right of the card! I used an amazing Prima flower part of their Rose Trellis collection. This time I used one and added some glitter on it. To finish off, I added a little chipboard swirl which I painted in purple and some KaiserCraft, and voila!

The last one has a more masculine feel. I did the same technique of the first card (Distress Ink and sprayed some water with my Mini-Mister) the star on the center is of the same ink but it was used on a star-shaped chipboard that's why it's darker. At the end I wasn't satisfed, so I decided to add some faux-stitching (doodeling) with black and white pens.
That's it for this week girls! I hope to feel much better for next week so I could show more new creations! Have a nice week!

Kim @ KLDezign

Wednesday, November 11, 2009

Thank You Magnet

This gift magnet was very easy to make and doubles as a great little gift!

Simply take a small envelope and open it up to create your template. Then, use the template and trace the envelope shape onto a double sided cardstock (I used papers from Sassafras Sweet Marmalade kit).

Once your template is cut, re-create the original envelope folds using a ruler and a scoring tool.

Then measured the inside back panel of the envelope to determine the size of your magnet; make sure that it will fit inside.

Cut the background from a colored paper and add a piece of cardstock in an accent colour ( I chose red) to your design.

Add a coordinating flower and use letter brads and stickers to spell out a sentiment of your choice.

Use some rhinestones or any other embellishment to complete the design.

To make the yellow bow, just take a piece of scrap paper, ink the edges, fold it and attached it with a stapler.

Once your design is complete, cut a piece of magnet that is the same size of the background paper and adhered it to the back.

You can find sheets of thin magnet that can be cut and found at your local dollar store.

To insert the magnet into the envelope, just cut small slits in the top left and bottom right corners. Once your magnet is inside....voila.....your work is complete!!

Racquel

Tuesday, November 10, 2009

Cricut Tuesdays with Michelle

Hi Everyone and welcome to another Cricut Tuesdays with me!

For my birthday recently my awesome husband gave me a DSLR Camera! How cool is that eh? Well being the novice photographer that I am jumping into a new breed of cameras is something completely foreign to me. So since then I have been trying to take the best photos possible. As a result it has been hit and miss. That is why I was 'absent' last week from my usual column; my photos did not turn out well even after much altering. I think this week I did a pretty good job!
Check out my featured layout below:

I know that we are in the Fall Season and depending which side of North America you live on; you have either celebrated Thanksgiving or just about to. But I cannot forget to scrap my summer photos nor should you. You may be preparing projects for the upcoming season including Christmas but I believe this is a great 'break' from all those preparations. This can be a chance to reflect back on how the summer was for you and your family.
Also if you are like me once you get into a mass producing mode (i.e. making the same card say 100 times over); taking a scrapping break to work on a summer project may result in thinking, 'where do I begin?' This is where the PDSS Sketches come in really handy (you can find them over at the forum under POSH CHALLENGES.

I have mentioned these before and am avid fan. In fact the layout I created was from sketch #14. So all you need to do is pull out some of your favorite summer color papers/cardstock and embellishments, take your sketch and I bet in no time you'll have a fantastic page created in less time than you think.

So don't you think it's time for a scrapping break? Head over to the Interactive Community to check out all the wonderful PDSS sketches right now. Plus don't forget to check out the PDSS Card Sketch Challenge #1 which is hosted right here on the blog! There is a great prize to be won and this may also be a great starting point to create those holiday cards. Speaking of which, I must get back to creating.

Until next Tuesday, Happy Crafting! ~Michelle

Monday, November 9, 2009

Animal Bash!


I just LOVE Prima's Animal Bash Collection! Check out the super cute products featured on the Posh store homepage!!

This card was so fun & super quick to make!!!

I cut a 5 x 5 inch card out of kraft cardstock. I then cut a 4.5 x 4.5 inch piece out of the Celebrations patterned paper. I used my fingernail to distress the edges. I adhered the piece onto kraft cardstock. I also cut a 3 x 3 inch piece out of the Animal Bash patterned paper. I used a border punch to create the scallops.

I then added the ribbon pieces along with a few staples. I also distressed the edges of the card with red chalk ink.

Finally, I added my title using Jillbean Soup and My Little Shoebox alpha stickers! For the O in love, I used an Animal Bash Peeble.

The possibilities are endless with this collection!!! Have a GREAT day everyone!!!

Kristen

Sunday, November 8, 2009

Clearly Counting Down The Days...

I am in love with the way this project turned out. So much so I think i'm going to make one that I can use for the entire year.

Isn't this such a fun way to countdown to Christmas?????

I took a plastic frame from the store, it's the kind of frame that the picture slides into and has the flat bottom so that it stands up.

First I had hubby drill 4 holes in the top of the frame to hold the numbers up with my rings. The rings work great because it makes the numbers so easy to flip over as the time draws near!!!

If you can't drill holes in the top I do have another idea for you. You could put velcro on the back of your numbers and on the frame to hold the numbers up.

Next I painted the edges of the frame and the numbers before I did anything else.

Then I picked out the paper I wanted to use. I loved the little snowman circles on Cosmo Crickets Golly by Jolly line so I used that.

You can see behind the word Christmas is where I put the snowman. Grabbed a bunch of embelies that matched and sat down to work. I did some stamping with a swirl stamp I had, and some with a snowflake stamp. For the stamping I used Staz-On ink. This way I knew it would not rub off.

Now for my numbers. I found this acrylic like paper and used that. I'm sure you could use transparency paper also. I cut the acrylic 2 inches wide by 3 inches long. You will need at least 12, 13 if you want to put "08" when there are only 8 days left. Make sure your holes on the numbers line up with the holes on your frame.

Hope you enjoyed my coundown til Christmas project! HO!HO!HO!

Stacy

Saturday, November 7, 2009

O' Christmas Tree - Mod Podge Ornament


I thought this might be a fun project to make with the kids for the holiday season. It's fun to make, but a little messy!

Cut your patterned paper into 1/2 x 1/2 inch squares. Place you ornament on a piece of computer paper to keep the glue contained. (don't use newspaper as the ink may come off onto your patterned paper when you put the glue on).

Hold the top of the ornament with one hand and use your brush to put the modge podge on one part of the ornament. Apply enough glue for maybe 2 squares of paper to start.

Next you will need to place a couple squares of paper over the glue then press firmly to adhere then brush on more glue and glue in more paper. Make sure you overlap the paper squares on one another.

Once you have all of your paper on the entire ornament, completely cover with a coat of modge podge. At this time I also put liquid pearls around the top of the ornament to look like snow then let the entire thing dry overnight.

You are now ready to decorate as you please. You can add some beads, ribbons, adhesive pearls, Stickles for some glitter effect...

You now have a cool, fun, homemade ornament for your Christmas tree.

Stacy

Supply List:
Paper mache/blank ornament (I picked this one up at the dollar store)
Mod podge / waterbase sealer and a brush to apply with
3 strips of 1/2 by 12 inch patterned paper
Ribbons, beads, and buttons
Liquid Pearls (Ranger)
Stickles (Ranger) or Glitter Glue
and any other fun things you'd want to use to decorate!

Thursday, November 5, 2009

Got Flowers??

Flowers are one of the most versatile and fun scrapping embellishment!!! They come in all colors, shapes, sizes, and textures. They can be mixed and matched and paired with almost anything. Have you see the Prima Flowers that are in the Posh Store?? There are so many to choose from!

Here is a layout I completed using lots of fun flowers from the store!


I love the sugar coated Primas, so sparkley!!


They are the perfect size, not too big and not too small. Add some bling or opaline swirls and you get a great match.


If you haven't already checked out the flowers AND the bling in the Posh Store, you must!

Supplies:
Cardstock: Kraft
Patterned Paper: WRMK Nonesense/Whiteout Collection
Flowers: Prima Sugar Coated, Kaisercraft Rhinestone Blossoms, BoBunny
Bling: Basic Grey Opaline Swirls, Bazzil Basics Adhesive Jewels, Basic Grey Bling Swirls
Ribbon: WRMK Flocked Lace
Alphas: MLS mini alphabet letters, Basic Grey chipboard letters

Thanks for stopping by!!

Tuesday, November 3, 2009

PDSS Bi-Wkly Card Challenge ~ Sketch #1

Good morning everyone. I'm your hostess, Dawn. We at Posh Design Scrapbook Store are proud to announce our very first Card Sketch Challenge.

These challenges will be on a bi-weekly basis. So that means you will have two (2) weeks to get your creations completed, loaded and linked up.

Posh Designs Scrapbook Store is giving this CC Designs "Sugarplums Pumpkin Emma" Stamp to one lucky winner of our challenge.

All you've got to do is create a card or project using the sketch provided. Post to your personal blog or gallery of your choosing and link it back here in the provided Mr. Linky.


Sketch #01


If you need some inspiration to get you started here's what the lovely DT did to help you along.

Mara

Stacy

Kristen

Michelle

Inside her card
Deadline: November 16th @ midnight 12:00 am EST.
Please link up using Mr. Linky below. It simple to use. Just type in your name and place a direct link to your creations.

Thank you!
Posh Designs Scrapbook Store


Blog Design By Sour Apple Studio © All Rights Reserved.