Nos membres - Our peeps

Showing posts with label Cricut Tuesdays. Show all posts

Tuesday, January 5, 2010

Cricut Tuesdays with Michelle

Happy New Year and Happy 1st Tuesday of 2010! I want this year to be year that you continue to play, grow creatively and be constantly inspired to try new things ‘outside of your comfort zone’. Scrapbooking, cardmaking and paper-crafting are all wonderful outlets to express yourself while crafting keepsakes that will be cherished. Personally for me that is why I fell in love with this hobby.

In keeping with my wishes for all of you, I have decided to stay true those wishes and bring that upon myself; therefore my weekly Cricut Tuesday column will change to bring you more die-cutting ideas, tips & tricks and inspiration using other die cutting tools such as punches, the Big Shot and the Slice machine. Now don’t worry… I still adore my Cricut (it has not been abandoned); I am simply shifting the focus away from the Cricut machine to incorporate other tools to mix things up a bit for me as a paper-crafter.

So let’s take a walk down memory lane as I gather up for you my best tips, tricks and past projects to hopefully give you the inspiration to best utilize your Cricut machine to its full potential.

Tip #1:
Layer, layer, layer… Take any cartridge that you have and layer on all the creative features possible to give that ‘pop’ factor to your projects. Use solid cardstock, mix and match patterned papers; try even mixing and matching solid cardstock with patterned paper for a unique look. Also try it with phrases, shapes, and letters. I bet ya you’ll be amazed with the results. Here’s an example of one my favorite layouts below featuring the Storybook cartridge:


Tip #2
Create your envelope first when cardmaking… This tip is true for any cartridge Provo Craft has created that has a coordinating envelope with card. Cartridge examples include: Wild Card, Beyond Birthdays, and A Child’s Year. Whether your card is going to be a shaped one or a standard shape such as rectangle or square; you will need to create your envelope first to ensure the optimal fit for your card to be inserted inside.


  • Trick #1: Press the Fit to Page button ON. Your Cricut machine will automatically calculate for you the maximum size of envelope. Don’t forget to turn off that button once your envelope has finished cutting.
  • Trick #2: Remember that calculated number so that you can adjust your size dial accordingly to create your card.
  • Trick #3: To mail your cards use a heavier weight cardstock such #65 or #80 for your envelopes and lighter weight cardstock/patterned paper to create your card (I mention this because in Canada our mailing system is based on weight and size; if your country does not charge you to mail your cards in this fashion; this trick is completely optional for you). Reverse the papers/cardstock used when personally giving the card to the recipient.
  • Trick #4: Have any doubled sided patterned papers to use up? Using these types of papers automatically creates a ‘liner’ for your envelope. This trick is especially useful when using the Wild Card cartridge; the ‘liner’ creative feature now becomes optional.

Here are 2 photos of some of my favorite cards and coordinating envelopes created this past year:


Tip #3
For quick assembly of a paper crafting project; use 1 cartridge that has coordinating fonts, phrases and/or shapes such as Walk in My Garden or Storybook.

Here is a coordinating card, tag and envelope created all from the New Arrival cartridge:
(This next statement is an oxymoron but…)

Tip #4
For added interest, mix up your cartridges to creative a unique paper crafting project. If you have the Provo Craft Gypsy or the Cricut Jukebox; these tools will maximize your ability to coordinate fonts, images and phrases from all the cartridges in your personal Cricut library.

Here is my layout created for the PDSS Sketch Challenge that used the Accent Essentials and George and Basic Shapes cartridges:

I am looking forward to the upcoming year where I will be stretching my creative muscles in order to inspire and help you. Together let’s become better paper crafters. Welcome to your new Tuesday – Die Cut Tuesdays with me!

Happy Crafting!
~Michelle

Tuesday, December 29, 2009

Cricut Tuesday with Michelle

Hello and Happy Tuesday!

I hope everyone had a wonderful, memorable Christmas and that Santa brought you new scrappin' goodies to play with! With alot of the Christmas crafting out of the way; let's get back to just havin' fun (not that making Christmas crafts is not fun or anything...).

Here's a quick project to make using the Wild Card cartridge. This card was created from a special request I received a couple of weeks ago and you know who you are ;) So here is the Owl Card located on page 72 and everything was cut at 5-1/4". The best part of this cartridge is all the die-cuts coordinate with the main images (the card and envelope). This includes layers, icon, frames, liners and phrases plus so much more.

Here are a few tips I learned along the way when using this cartridge:
  1. Use cardstock the blackout creative feature to create your card base only.
  2. Use patterned paper as layering piece over top the above die-cut using the standard cut image.
  3. Do not change the size dial after you've created your envelope. This includes cutting the phrases, icons and layers.
  4. For quick assembly, use a paper collection already coordinated for you and/or scraps.
  5. Add other embellishments and/or stamps to your card or envelope to add interest like I've done here with my envelope (I used a bird & cherry imaged stamps).
I hope you enjoyed this quick and easy Cricut Tuesday edition! I'll see you in the New Year - All the Best in 2010!

Cheers & Happy Crafting ~Michelle

Tuesday, December 22, 2009

Cricut Tuesdays with Michelle


Happy Holidays Everyone and I am glad you’ve joined me for another edition of Cricut Tuesday with me!

Christmas Day is only 3 days away! Do you still have gift wrapping to do? Well this week I am going to show you how to make quick, beautiful gift tags using the newest Cricut cartridge, ‘Very Merry Tags’ which is a Limited Edition cartridge for 2009-2010.

For those of you who have not seen or aware of this cartridge here’s a bit of info about Very Merry Tags:
  • This cartridge is more basic than your typical Solutions cartridge.
  • There are no creative features.
  • The price point is geared to be lower than your typical Solutions cartridge based on the above two factors.


From what I’ve seen this holiday season and for the Spring 2010 season; these types of cartridges will be holiday themed based for that particular time of year (though please do not quote me on that, I am not entirely sure – I am going on by what I’ve seen in the market place thus far).

To create these tags I recommend using a size no less than 2-3/4” for some of the shaped tags due to its intricate cuts. *Tip: If you choose a size larger than 3” there will be enough space on the back of the tag to do some journaling. You can substitute these tags for cards if you are truly in a pinch of time.

What you will need for this project…


  • Christmas themed papers (optional) - You can use these papers for more basic shaped tags.
  • Cardstock in your choice of color(s) – Try using metallic, pearlized or glittered cardstock such as found in the Hippie Chic and/or All About the Girls DCWV cardstock packs, found here. *Tip: Head to your scrap stash first!
  • Cricut Marker in your choice of color (optional) – To create a quick outline of the shaped cut of the tag without using ink pads, etc to color the edges. Though you can leave this step completely out if you wish.
  • Ribbon, Cord or Thread
  • For this project I used a black Cricut Marker and set my size dial to 3-3/4” and 4” (based on the size of scraps I had at the time of crafting).
 Here are the instructions to create your ornament:


  1. Set your size dial to at least 3-3/4” or taller. 
  2. Ensure your pressure and depth adjustments are appropriate to your paper/cardstock of choice. Select your tag image in row 3 or in row 5. These are the set blackout creative feature for each of the tags. Press CUT. 
  3. Then press the corresponding shaped tag in rows 1, 2 (for row 3 blackout tags) or in row 4 (for row 5 blackout tags). Do not adjust your size dial.
  4. Insert your Cricut Marker color and Press CUT.
  5. Once it has completed your drawing; Press LOAD PAPER. Switch your marker out for your cutting blade.
  6. Press REPEAT LAST, then press CUT.
  7. Nest and adhere the shaped tag die-cut onto the blackout tag.
  8. Write your message on the back of the tag (optional).
  9. String through your ribbon to hang off of your present.


Although this cartridge is oriented to the holidays; think outside of the box! The present shaped tag can be used for birthdays or baby showers. The ‘joy’ or ‘warm wishes’ sentiment tags can be used for a get well or house warming gift. Plus the blackout tags are fantastic to use on their own to coordinate the gift wrap and as mentioned above substitute the gift tag for a card. Mix up patterned papers or even coordinate with solid cardstock scraps.

If you do not own this cartridge, I encourage you to look at your cartridges that contain shapes or sentiments and apply the above creative suggestions to help you get your gifts ready for the holiday season.

I would also like to take this opportunity to wish every single of you a Very Merry Holiday Season! May you and yours be blessed with good tidings, wonderful memories with family and friends you share this occasion with.

Cheers! ~Michelle

Tuesday, December 15, 2009

Cricut Tuesdays with Michelle


Happy Holidays Everyone and I hope you are having a great start to the week!

Can you believe we are only 10 days away from Christmas Day? Unbelievable eh? And if you are like me there are many last minute preparations you need to find some crafting time to do. Also if you still have tons of Christmas papers, cardstock and/or themed embellishments to use up, this is another great opportunity for you to clear through your stash! Between us girls, it’s all about clearing through your stash so you can justify buying the newest, freshest stuff found right here at the Posh Designs Scrapbook Store, right? J

This week I will show you how to create quick, simple and adorable Christmas ornaments. You can use these ornaments as part of your gift giving trim, a gift tag for that present, home décor, and so much more…

What you will need for this project:
  • Christmas themed papers
  • Cardstock in your choice of color(s) – Try using metallic, pearlized or glittered cardstock.
  • Holiday themed embellishments – You can also use ‘everyday’ embellishments such as solid colored brads, rhinestones brads, buttons; it is totally up to you!
  • Heavy-Duty Hole Punch (like the WRMK Crop-a-Dile) - 1 punch per ornament required. The purpose of this tool is to thread cord/ribbon through to hang your ornament onto your present, tree or within your home.
  • Any Cricut cartridge you have on hand containing Christmas themed images such as Joys of the Season, Christmas Cheer, and the Solutions cartridge Christmas Noel, Snow Friends and/or When It Is Cold Outside.
  • Ink Pads or Paint Dabbers (optional) – These tools are used along the edges to give a finished look to your ornament.
  • Ribbon, Cord or Thread – To string your ornament and hang onto your present, tree or within your home.
For this project I will be using the Joys of the Seasons cartridge – SantaFce image set at 3-1/2” using the standard and layers creative features. *Note: For this particular project, it will be best to choose a shaped image that is ‘chunky’ for easier handling when assembling the pieces together as well it will hold up better when finished. I also recommend cutting your shaped images at a larger dimension as well for the same above reasons.

Here are the instructions to create your ornament:
  • Set your size dial to at least 3-1/2” or taller.
  • Ensure your pressure and depth adjustments are appropriate to your paper/cardstock of choice. *Tip: You will be able to fit 4 cuts onto 1 – 12 x 12 piece of paper/cardstock as long as your size of your cut is less than 4”.
  • Press your QUANTITY button ON and set to ‘2’.
  • Select your image and Press CUT.
  • Once it has completed the 1st two cuts; Press the FLIP button ON.
  • Press the REPEAT LAST button and this will automatically bring up the last image cut. Then press CUT. Do not adjust any of the dials.
  • If your image has layers, cut them out without adjusting the size dial.
  • Nest and adhere all layered pieces onto each die-cut (if applicable).
  • Take each cut and score each of them in the middle lengthwise. Ensure all score lines are equal per die-cut.
  • Handling the 1st die cut (non-flipped), take the one folded side and match up to the 1st FLIP die cut. Adhere both ends together. You will notice that the cuts will align together seamlessly indicating to you that you have the correct sides matched up.
  • Take the side of 1st flipped die-cut and adhere the side onto the 2nd non-flipped die-cut.
  • Take the 2nd non-flipped die-cut and attach together the sides of the 2nd flipped die-cut.
  • Re-fold each score line for crispness.
  • Ink or Paint the edges of the ornament (optional)
  • Punch a 1/8” hole at the top of the ornament and string through cord or ribbon of your choice.
  • Embellish as desired.
This project is also another great idea to use for parties, create a mobile for a baby’s room or even dress up your scrap space! Try different Cricut shaped cartridges. Also don’t think you need to only use the standard creative images found on the cartridge. Experiment with the Shadow creative feature or even the Blackout creative feature for a different look and/or to add a bit of size.

Have fun creating your ornaments! And until next Tuesday, Happy Crafting!
~Michelle J
Tuesday, December 8, 2009

Cricut Tuesdays with Michelle

Happy December Everyone and Welcome to another edition of Cricut Tuesday with me!

Over the past few weeks I have been focusing on cards. For my last card feature of the year, I still had to mass produce cards for extended family and friends. Based on the principle to use one die-cut shape, whatever I had alot of within my stash; I chose my color scheme and here’s what my card turned out to be.

Here is the list of materials I used for my card. You may alter anything on this list to what you have in your stash and/or how elaborate you like your card to be.

  • 12 x 12 sheets of kraft & cream cardstock
  • 1 background stamp
  • Brayer
  • Stamp-a-Ma-Jig
  • 1 sentiment stamp
  • 1 greeting/verse stamp
  • 2 ink pads in different colors that complement the colors of cardstock chosen. If you are new to stamping, start off with a good, well versatile stamp pad like StazOn
  • 1 border punch
  • 1 die-cut shape
  • Corner Rounder punch (like WRMK Corner Rounder Chomper found here, optional)
  • Embellishment of choice

If you recall my 1st batch of Christmas cards, I used 1 cartridge to create my card, envelope and sentiments. There were lots of layers, colors, and textures. Based on those principals from that post, here are the instructions for this week’s card:

  1. Take your 12 x 12 cardstock and cut into thirds creating 3 cards that will measure 4 x 12.
  2. Create a gate fold by scoring and folding 2” on each side into the middle thus creating a card to measure 4 x 6.
  3. Use the corner rounder punch on each corner (optional).
  4. Border Punch each card fold opening (optional).
  5. Background stamp along the front of the card:
  6. Border punch the card fold openings (optional).
  7. Each die cut shape/layer was cut at 3-1/2” each (in which was the perfect size as it fit lengthwise on the card front). The snowflake (#4) for this card is taken from the Joys of the Season cartridge using the Layers, Blackout and Standard cut images. The standard image cut was embellished using alcohol inks on glossy paper. I chose a color scheme to complement the ink color I used for the background and sentiment stamped imaged. I paired my color scheme with cream cardstock as my blackout cut image for contrast. The layers image cut using the vellum patterned paper. (optional) If you do not have alcohol inks to create your own patterned paper; choose patterned paper from your stash instead!
  8. (optional) Stamp your greeting or write your message inside the card. As you may see I wrote my message in a different color of ink but I did use the same color of ink for my greeting as I stamped my sentiment on the card front with.
  9. Create a complementary envelope using the Beyond Birthdays cartridge, rectangular envelope setting your size dial to 8-1/4” (1 – 12 x12 cardstock/paper will create 1 envelope). Score and adhere as usual.
  10. Border punch the envelope opening (not shown, optional). Tip: This is a great opportunity to use up some of your Christmas patterned paper stash that is one sided. Simply make your envelope cut then score and fold all the patterns inward leaving the white on the outside. Not only do you have an instant envelope liner but the patterned paper will also act as an additional barrier for others not to ‘peek’ into the envelope.

That’s it, you’re DONE!!! Again you can make your card as elaborate or as simple as you like. Plus you can use this template to create all sorts of cards not just Christmas. Think kids valentines or party invitations, even thank-you cards. Also use this template to create as many cards as you need. From one to one hundred, when you want to give a handmade, created card but don’t have a lot of time; this is a perfect example to show you that you can do it!

Now that I am officially done my Christmas cards for this year; I’ve got to start on some gifts and home décor for the holiday season. There have been so many great projects created found on this blog! Go check them out today. So until next Tuesday, Happy Crafting!

Michelle

Tuesday, December 1, 2009

Cricut Tuesdays with Michelle

Happy Tuesday everyone and welcome to another addition of Cricut Tuesdays with me! Now you know me by now, I love using my Cricut! However this week I kind of gave my “E” bug a slight break and only used my machine twice. Can you guess which project? Read on below to get the answer.

Okay now, let’s get started…

In my last post I had mentioned how you can use metal as a scrapbooking medium on your next projects. Why metal?

  • It is easier to cut and manipulate than you think.
  • It is easy to dry emboss with.
  • You can stamp onto metal using Staz-On inks (which is solvent based = works best on porous surfaces) in a variety of colors, check them out here.
  • You can use alcohol inks to jazz up the sliver coolness of metal with color.
  • You may have plenty of metal already sitting in your recycling bin such as pop cans.

    Before you gather up all your metal, here are a few tips to keep in mind…
  1. 1. Pop cans will actually work best as a scrapbooking medium because it is the most pliable to work with.
  2. Ensure all your cans are rinsed thoroughly and dried out completely to avoid any extra splatters when cutting.
  3. Choose a pair of scissors that can cut easily through metal such a kitchen scissors or a pair you do not mind using against a tougher material vs. paper or ribbon.
  4. You will need to use an extremely sticky or extra hold type of adhesive to glue down this medium onto paper.
  5. This is a great opportunity to use up your ribbon stash as the seams of metal will require covering up. This will avoid any crooked lines shown plus it is safer (i.e. no sharp edges) when your card handled by the recipient.
  6. When cutting open your cans start by poking a hole with your scissors near the top of the can (I am referring to the top of the can as its opening – where you drink or pour out from).

  • Next you will cut around the top following the top edge of the can. Do not worry if you find you are having ‘strays’ of metal; it will be trimmed off later.
  • Once that is completed, cut along the side of the can towards the bottom.
  • When you reached the bottom of the can, cut around the can following its bottom edge.
  • Discard the top and bottom pieces.
  • Trim off any stray edges along the sides of the metal.
  • You will also notice that the metal is still ‘curly’. That is okay.
  • To straighten your metal piece, take the whole piece and handle it on both sides holding it length wise.
  • You will then run the body of the metal against a hard edge such as your craft table. Do Not Use any hard edges you would not want scratches on because it might happen. You may want to repeat this a few times.
If you still find your metal piece requires additional flattening; lay some heavy objects such as books on top and leave overnight.

Here are some examples of cards I made using pop can metal. Both of these cards are for actual birthdays in my family. You can see from this photo I simply chose to leave the metal in its natural state. In doing so I was able to achieve a dry embossed look that added texture and more shine. Plus the sliver color of the metal truly played up the masculine feel I was going for!

In my next card (created especially for my Mom), I chose to use alcohol inks to jazz up the metal with color. Alcohol inks work amazingly well with this medium as it absorbs the color quickly, drying time is minimal and if you do not use too much color from the start; you may not need to use any blending solution (I had used none on this piece of metal for this card here). Now you may not notice but I did dry emboss this as well (I apologize if it does not show up well in the photo).

This is something you can do to add more interest and layers onto your piece and therefore your overall project.

On a side note I would like to explain how I created these butterfly embellishments. Now before I go into detail, I must apologize as my photos do not showcase the glossiness of these pretty butterflies. What you will need are…
  • Butterfly shapes either die cut or punched. I chose to use a butterfly punch.
  • UTEE (Ultra Thick Embossing Enamel)
  • Scrap cardstock
  • Heat Gun
  • Embossing Pad such as the Inkessentials Watermark Resist Ink Pad found here.
  • Patterned paper of your choice. For my card, I used the K & Company Paper Stack, Que Sera Sera which can also be found here.

Now how to create these embellishments…
  1. Cut scrap cardstock into skinny strips. Then fold each end using an accordian fold into small squares/rectangles (depending on how wide your strip is). *Ensure each cardstock strip is no wider than your butterfly shape. This will make is easier to remove when completed.
  2. Take your butterfly shapes and adhere repositionable adhesive on the back/reverse side. Do not cover the entire area, just enough to adhere the shape onto the cardstock strip.
  3. Then pick up your butterfly shapes (best with your fingers) and ink up each shape in the watermark ink pad. You will need to get a good amount of ink onto the shape.
  4. Place each butterfly onto the cardstock strip end where the accordian fold is.
  5. Pour UTEE and emboss as usual. Tap off excess on the cardstock strip. Do not touch or flick off excess on the butterfly shape itself.
  6. (optional) You can add layers of UTEE for a thicker glossier look by applying more UTEE while it is still hot OR you can leave it as is with 1 layer for a cracked, distressed look. *You may find when you are embossing that specks of powder fly off; this is completely normal.
  7. Leave to cool and dry. Repeat with remaining butterflies.
  8. Adhere butterfly embellishments onto your project as desired.
Once you have completed your last butterfly, the 1st butterfly will be ready to remove off the cardstock. It will not be hot to touch.

Try other shapes or even die cut letters or phrases for an alternative look.

So can you tell where I used my Cricut??? If you guessed, the square card and envelope; you are correct! I used the Beyond Birthdays cartridge for both pieces.

The best part of using metal materials is when you tell people about it. They will not believe you!

I hope you have a lot of fun using pop can metal in your projects as much as I did. I even started to build my pop can metal sheet stash J I bet you will too.

Next week I will be showcasing another Christmas card a la the style I created a couple of weeks ago. This will be a quick and easy card to recreate in less time while producing more cards as one shape was only used. I can’t wait to show you!

Until then next Tuesday, Happy Crafting!

Michelle

Tuesday, November 24, 2009

Cricut Tuesdays with Michelle

Happy Tuesday everyone!

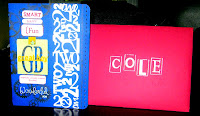
This week we will be focusing on cards as my family just celebrated my Son's 2nd Birthday! My intention was to make the biggest card ever on my Cricut (with matching envelope of course) and create a super easy card ready in mere moments.

Well to be honest the card is not as big as I had anticipated and when making the card I used alot of simple elements however I layered so much therefore the assembly took longer than I planned. In the end though my Husband and I were so pleased with the results; this card was the talk amongst all the family over dinner.

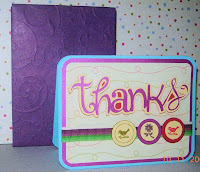
The second card I created is a Thanks card to acknowledge the wonderful gesture and gifts my Son received (more like spoiled) from our family and friends.

I used 2 cartridges for these projects: Beyond Birthdays & Graphically Speaking. If you have not already own these cartridges; may I suggest that you do.

Here's why...

First, Beyond Birthdays is chock full of useful and everyday sentiments to cover off most occasions plus there are icons to go along with each sentiment that can be layered. And speaking of layering this cartridge has all the 3 creative features (IMHO) to make layering easy yet stand-out on your projects whether it be a card or a scrapbook page.

These 3 creative features I am referring to are: standard, shadow and shadow blackout.

Let me briefly explain the difference:
  • Standard: the set image as is when you press its key (same between non-shift & shift keys).
  • Shadow: the Standard image designed slightly larger creating a 'shadow' when you nestle the standard cut image on top of this type of cut.
  • Shadow Blackout: the Shadow image designed with filled in spaces creating a blackout effect.
This cut will nest exactly with its corresponding Standard creative feature layering on top. When using all 3 creative features in this manner makes any die-cut pop off a project even when using basic, plain cardstock. Plus having 2 different card designs (square and rectangle) standard to any cardmaking project these days with coordinating envelopes; you will be set to create any card quick and easy!

Secondly I personally adore the Graphically Speaking cartridge and used it for my Son's Birthday card is because of the numeric graphics as well as the versatility of its captions and quotes. This card is filled with with so many of those options plus a variety of shapes and icons that you can easily mix and match to your hearts content. And when you can mix and match your die-cut elements; the possibilities are endless!

Now keeping all that in mind, here's how to re-create these cards to suit your occasion.

Birthday Card:

Ensure your settings are set to '24' (aka mat size 12 x 24) on your Cricut machine. How to do this is to press the Settings button and push OK until you reach the Mat Size option. Once you reach that option, use your arrow key to change the mat size then press Settings to exit. You will now have to turn off your Cricut machine and turn it back on to reset the mat size (wait a few seconds in between). You can tell if you are successful when your mat size icon (located on the bottom left of the LCD screen) shows '24'. If not, repeat the above steps and try again.
  • Insert a 12 x 24 sheet of cardstock into your Cricut.
  • Press your Fit to Page button on.
  • Select your envelope shape as desired (my card I chose the rectangle envelope option).
  • Press Cut. Remember the size your Cricut machine will cut at as you will use this same size to cut your coordinating card at.
As you may know I am a huge advocate in creating your envelopes first when making them with your Cricut. Why? To ensure the best possible fit without error! It is the best tip I can give to any cardmaker when creating your envelopes and cards from a piece of cardstock in any size. Make your envelopes first!
  • Once your envelope has finished cutting; insert your 12 x12 cardstock into the machine and press the coordinating card to the envelope shape previously chosen.
  • Ensure your Fit to Page button is off.
  • Re-adjust your size to the number memorized from step #5. Then press Cut.
  • Score, fold (and adhere where necessary certain folds) your envelope and card.
Using the Graphically Speaking cartridge:
  • Set your size dial at 3-1/2". Cut the 'GB tag' (Image14).
  • Cut the 'great boy with fastener' (Imag14-s) in another color piece of cardstock/paper.Layer and adhere pieces together.
  • Cut the '2' numeric graphic (Image42) using the Fit to Length button. Adjust size dial to 8-3/4" prior to.
  • (optional) Border punch the cardfront opening as desired for a decorative touch and interest.
  • (optional) Decorate your cardfront, stamp images that suit the occasion as desired. This can be a mix of words and/or shapes.
  • Adhere your cut pieces as desired onto your cardfront.
  • Heat emboss a greeting to the recipient (optional) or use white StazOn ink or white Pigment Ink - use whatever you have on hand. For my project I used white embossing powder.
That's it! Your card is complete. One of the stamp images I used was a stitching effect (along the punched border of the card). This is great way to add texture and interest instantly. You can find the stamp image I used on the Sassafras Stitchery Stamp Set here. Sassafras stamps are one of the best out there - amazing quality, great value for the buy!

Now onto the next card creation. Now because I has to mass produce these; I chose a to use a simple design using as many colors and textures as possible to achieve that WOW factor. I hope you will agree. For this card I used cardstock that has a pearl sheen to it. These stacks are from DCWV and there are two here I highly recommend, Hippie Chic and All About Girls.

Now let's get started...

Thanks card:
  • Take a 8-1/2 x 11" cardstock and cut in half. Score each card in half creating a standard A2 size card.
  • Cut a piece of solid cardstock to 5-1/4 x 4". Set aside.
  • Cut a piece of patterned paper to 5 x 3-3/4". Set aside.
  • Using the Beyond Birthdays cartridge; cut the word 'Thanks' using all three creative features.
  • Set your Fit to Length button on with your size dial set at 3-1/2". Press cut using the Shadow Blackout creative feature first. Remember the number the cut will be set at.
  • Turn off your Fit to Length button and cut the remaining layers with the other two creative features. Layer and adhere all pieces together. Set aside. Choose papers that coordinate with your patterned paper for a cohesive look.
  • Adhere the cardstock pieces cut from steps #2 & #3 together and layer a piece of ribbon on top.
  • Adhere 'Thanks' onto the card as desired (optional, use 3-D dimensionals to adhere).
  • (optional) Stamp images onto cardstock and adhere them onto cardfront as desired. For my card I used small images and then a circle punch to ensure I got the same cut shapes each time. Yes it is okay to use punches with your Cricut designs. The Cricut Police will not come after you, ha!
This card is now complete!

I hope you enjoyed these two card projects this week. Don't forget to enter the Posh Designs Card Sketch Challenge Contest. This is week #2 and there is a fabulous prize to be won!

Next week I will show you an interesting way to use metal onto your card projects. It may not be what you think and it may lead you to see this ordinary object in a whole new light.

Until next week... Happy Crafting!

Michelle

Tuesday, November 17, 2009

Cricut Tuesdays with Michelle


Hi Everyone and welcome to another Cricut Tuesday edition where this week I will be discussing how to mass produce cards with coordinated envelopes!

With Christmas almost on our doorstep I realized that I needed to get a big jump on creating cards for my husband's management team, extended family, friends, co-workers, the list goes on and on it seems...

In my case I need to mass produce over 100 cards with envelopes. So with my handy Cricut always in tow here are my tips and tricks to help you ease into your holiday cardmaking process.

This is a sample photo of the cards I created (appox 6 of each) in just over a week.


1) Take a 12 x 12 piece of patterned paper and cut into 6 -4 x 6" rectangles. Trim each rectangle to a 3-1/2 x 6" rectangle afterwards. Set aside.

2) Take a 12 x 12 piece of white or cream plain cardstock and cut into the 6 - 4 x 6 rectangles. Trim each piece afterwards to 3-3/4 x 6 " rectangle. Set aside.

3) Take another 12 x 12 piece of cardstock (can be textured or plain) and trim into strips of 4 x 12 rectangles. Score each card in half. Each card should measure 4 x 6" and should have created 3 cards from 1 piece of 12 x 12 cardstock. For my holidays cards, the color I chose of the main card base was taken from the color in majority of my patterned paper.

4) Take a piece of 6 x 12" cardstock and cut into strips of 1-1/2 x 4". Set aside. For the purpose of my holiday cards I chose the color of this piece of cardstock to coordinate. You should be able to cut 6 strips from this one piece of 6 x 12" cardstock.

5) Border punch as desired along the opening of the card. If you choose to follow this step, ensure all your cardstock pieces created in steps 1 & 2 are trimmed back at least 1/2" so that your border punch does not cut into all those layers of paper/cardstock. It may cause to jam the punch.

6) You may round your corners on your card bases and/or card layers. If you choose to do this, may I recommend the WRMK Corner Chomper Tool. This amazing lil' punch cuts through layers of papers and cardstock like butter! This tool has been a lifesaver and has become one of my recent favorites. You can find out more about it here.

7) Layer your larger cardstock pieces (from steps 1 & 2) onto your card base created in step 3. Layers should follow as: card base - white or cream piece of cardstock then patterned paper on top.

8) Take your smaller strips of cardstock cut from step #4 and emboss then distress to show the beautiful embossed pattern (completely optional, see photo below). In this case I chose white core cardstock however another beautiful option is are the Core'dinations cardstock packs found here which can add beautiful color. In my humble opinion Core'dinations cardstock is fabulous stuff! Okay moving on... Once you have embossed and distress each of the strips, layer them against the border punch trim on the card base.

9) Take a piece of ribbon and adhere along the seam of the cardstock strip to give the base a more finished look.

Now we get to the fun Cricut stuff... Using Beyond Birthdays cartridge I chose the following sayings, 'Season's Greetings', 'Create Joy' and 'Happy Holidays'. Why? Because all these images are attached and linked meaning that one cut is all it takes no matter which creative feature you choose. Also you will notice that I used all 3 creative features for each greeting - standard, shadow and shadow blackout. This is because it would pop against the patterned paper as well as make the sentiment standout on the card itself. Now if you know me by now I am all about easy peasy and because the way the cards were created you will be able to maximize minimal 12 x12 pieces of cardstock or if you have the 12 x 24 pieces of cardstock this would be a great opportunity to use them. So how you ask?

Follow me...

10) Ensure your Fit to Length button is on. Turn dial to 4-1/2 (to ensure the sentiment is centered on the card base). Insert paper. Select the Shadow Blackout creative feature 1st (because it cuts the biggest and is the bottom layer of the sentiment). Then select your sentiment. Press Cut. Your Cricut machine will then calculate how tall the image will cut. Remember that size!

11) Once that first cut is completed. Turn off your Fit to Length button off. Turn on your Quantity button. Choose in your settings how many of that one sentiment you need. Switch your size dial to the number shown in step 9. Press Cut. The Cricut machine will now work its magic calculating each time the image has been cut. So if you need to insert more paper; do not touch your dials or keypad - nothing. Just insert paper and press cut. That's all. In fact touching your keypad or machine after a cut has been complete may delete or alter your current work.

12) Cut each remaining layer of the same sentiment using the other 2 creative features. All you need to do is press which feature you want on the keypad. You do not need to switch buttons on and off or adjust any dials. You've done that work already in steps 9 & 10. How easy is that eh?

13) Once all your sentiment layers are finished cutting. Layer and adhere all the pieces together and place them onto your card base. I chose to use dimensionals adhere my sentiment onto each card to add some interest (as you will see in the photo below).

Voila your cards are now complete!

To create the envelopes you can use patterned paper or cardstock (just remember to adjust your pressure and depth dials accordingly). You will also be using the Beyond Birthdays cartridge to keep things simple.

*Note: 1 - 12 x 12 sheet = 1 envelope & 1 - 12 x 24 sheet = 2 envelopes

1) Select the 'rectenvl' (it is a shift key) image.

2) Set size dial to 8-1/2".

3) Press Cut.

4) (optional) Emboss and border punch the envelope opening after you have scored and folded
each envelope. I chose to coordinate the emboss pattern and border punch that was used on the
card.

5) (optional) If you are mailing these cards you may want to use glue tape of some sort to ensure a proper seal when closing the envelope.

Now you are finished! My best piece of advice to accomplish a mass number of cards is to take one task at a time. Maybe one step one day or for one week and so forth... The Cricut machine will be your lifesaver when it comes to your sentiments and envelopes; it sure was for me.

Have fun creating your holiday cards. I hope to see some in the gallery really soon! Until next week... Happy Crafting!

Michelle

Tuesday, November 10, 2009

Cricut Tuesdays with Michelle

Hi Everyone and welcome to another Cricut Tuesdays with me!

For my birthday recently my awesome husband gave me a DSLR Camera! How cool is that eh? Well being the novice photographer that I am jumping into a new breed of cameras is something completely foreign to me. So since then I have been trying to take the best photos possible. As a result it has been hit and miss. That is why I was 'absent' last week from my usual column; my photos did not turn out well even after much altering. I think this week I did a pretty good job!
Check out my featured layout below:

I know that we are in the Fall Season and depending which side of North America you live on; you have either celebrated Thanksgiving or just about to. But I cannot forget to scrap my summer photos nor should you. You may be preparing projects for the upcoming season including Christmas but I believe this is a great 'break' from all those preparations. This can be a chance to reflect back on how the summer was for you and your family.
Also if you are like me once you get into a mass producing mode (i.e. making the same card say 100 times over); taking a scrapping break to work on a summer project may result in thinking, 'where do I begin?' This is where the PDSS Sketches come in really handy (you can find them over at the forum under POSH CHALLENGES.

I have mentioned these before and am avid fan. In fact the layout I created was from sketch #14. So all you need to do is pull out some of your favorite summer color papers/cardstock and embellishments, take your sketch and I bet in no time you'll have a fantastic page created in less time than you think.

So don't you think it's time for a scrapping break? Head over to the Interactive Community to check out all the wonderful PDSS sketches right now. Plus don't forget to check out the PDSS Card Sketch Challenge #1 which is hosted right here on the blog! There is a great prize to be won and this may also be a great starting point to create those holiday cards. Speaking of which, I must get back to creating.

Until next Tuesday, Happy Crafting! ~Michelle
Tuesday, October 27, 2009

Cricut Tuesdays ~ Winner of a FREE Cricut Cartridge Announced!


Hello everyone and Happy Tuesday to you!

This week will be a relatively short post as today is my birthday! There will be no projects shown in this post. With Halloween right around the corner, my family and I are getting ready. My Son will be a dragon this year, he will be so cute!

I cannot wait to snap up the photos! I've got my cards and tags I made earlier this month (week 1's project), all my sweet treat boxes stuffed with candies ready to go (week 2's project) and I have also made a few more handmade home decor pieces inspired by my project posted last week. If you need to make quick projects in a snap, feel free to look back at any of my past week's projects in October for inspiration. They do not require alot of materials, assembly is super-duper easy (i.e. not alot of pieces to put together) and most of all fast to create.

I hope however big or small you celebrate Halloween, I wish you a spooky and fun time. Enjoy the evening/night and don't forget to snap up every photo opportunity possible! Be safe if you are trick or treating with your young ones.

I would also like to take this opportunity to thank all members of Posh Designs online Community/Forum site as well as the all our new followers and members who have joined us via my first ever Cricut Tuesdays Contest! I had so much fun planning this event and believe me this will not be the last. Most of all I would like to thank Nini for helping me make this event a success. She has had a huge helping hand in coordinating my efforts; thank-you Nini for all your support! I truly and deeply appreciate it!

So now for announcing the winner of our final grand prize

Drum roll please.... and the winner of a fabulous brand new in box Cricut SpongeBob Cartridge is....... Sherri C. from Ridgeway, ON, Canada!

CONGRATS Sherri, I will be contacting you for your mailing information. Have fun with your new cartridge! I cannot wait to see your first creation from it on our Gallery.

If you would like any instructions of my Halloween themed projects and/or have a question or idea for future Cricut Tuesdays, please leave me a message via the Community Site.

Thanks again everyone for your support and Birthday wishes. Happy Halloween!

Until next week... Happy Crafting! ~Michelle

Tuesday, October 20, 2009

Cricut Tuesday with Michelle and Announcement of the 2nd Contest Winner CONTEST CLOSED

Hi Everyone!

I hope you are having a great start to the week thus far... If shopping was on your agenda this past weekend; you will have noticed that Halloween merchandise is in full force dominating the shelves and store windows.


Well for a novice seasonal decorator, I wanted to have some fun with the Halloween decor in my home but was not ready to commit having decor pieces being stored in my home. So of course I used my Cricut and 2 cartridges: Cuttin' Up & Hello Kitty Greetings to create this really simple decor piece that took no longer than an afternoon to create.

This is a great opportunity to use up some of those Halloween papers either they are scraps, last year's sheets (so you can buy this year's paper packs such as Basic Grey's Eerie Collection, a good excuse to always buy, *lol*) or even use up what you've bought this year.


You may have noticed that I have used some scraps from previous projects from the past 2 weeks for my home decor piece. Also this is another wonderful opportunity to recycle those paper towel holders (which was used as my anchor) and cereal boxes (which were used for all the letters and bat shapes).


After some paint, sandpaper, eyelets and jute threading; you will have created a one of kind piece for pennies on the dollar and the best part... You have the choice to commit storing it away for next year after Halloween is over.

Thanks for looking and if you'd like the instructions, please send me a message via the online Community site.

And now for the 2nd Contest Winner Announcement to win a Cricut Storage Box plus a $20.00 Posh Designs Gift Certificate is... Cassandra from AZ, USA!!!

Congrats to you Cassandra and I will be contacting you shortly for your mailing information. I would also like to thank all the new followers and members who have recently joined PDSS community and especially to those who made comments on my sweet treat boxes. I hope you are having fun creating yours for Halloween and enjoying the blog and forum site as well!

Now we are near the end of my Halloween Cricut Series ending next week. It is also my birthday the following Tuesday! And to help celebrate my birthday you will have a chance to WIN a FREE CRICUT CARTRIDGE - Sponge Bob (BNIP).


If you are a follower and member of the PDSS Interactive Community, all you need to do is place a comment at the end of this post. If this is your first time reading Cricut Tuesday's Contest, please click here to find out how to enter your chances of winning. Spread the word about this fabulous contest - today!

Until next week... Happy Crafting!

Michelle

Tuesday, October 13, 2009

Cricut Tuesday with Michelle with 1st Contest Winner Announcement!!! CONTEST CLOSED

Hello and Happy Tuesday Everyone!

Well if you are a Canadian resident, I hope you enjoyed a lovely Thanksgiving weekend with your loved ones. It was certainly a cold weekend (at least it was here in Ontario) and I even heard of snow in some parts of Canada and in the US too. If you are a resident of the US, Happy belated Columbus Day to all of you!

This week is the 2nd installment of my Halloween themed Cricut creations. To coordinate with the card and tag, I created these sweet lil' treat boxes because really what's Halloween without some sweets eh? Currently I am middle of creating these boxes but have photographed the first five treat boxes to show some variation on how I cut these shapes.

This is such a quick and easy project to finish because all you need is the Tags, Bags and More Cricut cartridge, set a 12x12 piece of patterned paper or cardstock down and set the Fit to Page setting on. Also you can set the hole option so that you can thread ribbon through (see on 2 of my boxes) for a handle to leave on their doorknob or give to the person directly. That's it! And if you have more time, you can embellish, stamp and distress your boxes as desired.

Here are some handy tips I discovered when creating these treat boxes...
  • You will have enough paper leftover to make coordinating tags (like I've shown you in last week's post) and or use in your Halloween pages.

  • Only when using patterned paper or cardstock that is less than #65, place a piece of sturdy cardstock (a 2-1/2" square) on the bottom to hold the weight of the treats. Though you may want to reinforce the bottom of all your treat boxes in case you are feeling they are not sturdy enough. For cardstock/patterned paper over #80; this step is not necessary.

  • If you have white core cardstock, when you make the folds to create your boxes the core will show through = instant distressing without the extra work!

  • If you decide to stamp your images onto solid cardstock, I recommend using textured cardstock to get that 'worn' feel to the box. And if it is textured and white cored, that will equate to even a more distress look.

  • Pick treats that are light and small not only to pack in lots of sweets but also so that the boxes can hold them in too.
Have fun creating your treat boxes and I hope to see some your Halloween themed creations in the gallery over at the Posh Designs Interactive Community.

And now for the winner of the Cricut Tuesday Week #1 Contest is... Mary! Your prize is the 2-6x6 Stamp Sheet Sets manufactured by Circut plus a $10.00 Posh Designs Gift Certificate!

CONGRATS to you Mary and I would like to thank all the entries in last week's contest!

Now remember all the entries for last week's contest does not roll-over into this week. So if you are already a follower of the PDSS blog and joined the Forum ; all you need to do to enter this week's contest is to submit (via the Gallery) or link up a creation inspired by one of my Cricut Tuesdays blog post and leave me a comment below from now until the following Monday. If you are reading the contest info for the 1st time, please refer to last week's blog post for all the details.

This week's prize is one Cricut Storage Binder plus a $20.00 gift certificate to shop at Posh Designs! How cool is that. So get your chances in to win today! Please feel free to drop me a line over at the forum if you have any questions.

Until next Tuesday everyone... Happy Crafting! ~ Michelle

Tuesday, October 6, 2009

Cricut Tuesdays & Special Contest/Blog Candy Announcement

Stayed tuned to towards the end of this post as I have a special announcement regarding a contest related to this particular blog thread (Cricut Tuesdays)!

Hi Everyone!

Are you feeling the Autumn air, noticing the change in color of the leaves and admiring that golden sun? I am and Fall season is definitely upon us.

To kick off the 2009 holiday season is the time of year well loved by almost everyone... Halloween! My Son is quite young and does not quite understand fully what Halloween means especially to know when you can get lots of yummy treats (and I think that is kind of a blessing right now).

He will be celebrating his 2nd Halloween and to help him I have created these cute cards and tags to give to our neighbours and fellow kids in our immediate area. For these projects I blended the use of stamps, heat embossing, watercoloring with chalks and my Cricut with the A Child's Year cartridge. TFL!


Over the next couple of weeks leading up to Halloween I will be creating accompanying projects to coordinate with the above card and tag. By the last Tuesday of the month (on October 27th, my birthday); you will be able to create quick, easy and I think creative projects to help you and your kids & family celebrate Halloween; even if you are short on time!

And now for my special announcement... I will be hosting my first ever blog contest/candy for Posh Designs Scrapbook Store.

Take note of the following rules and regulations:

1) 1 prize will be awarded for the next 3 weeks to be announced every Tuesday in my blog post.

Prizes will include an assortment of Cricut products such as Stamp Sheets with Folders, Storage Binder, a brand new Cricut cartridge - Sponge Bob cartridge, yes you read correctly, a free cartridge giveaway, valued at 99.99$ USD and Gift Certificates from Posh Designs Scrapbook Store to spend any way you'd like!

2) To enter your chance to win one of the above fabulous prizes you must complete the following 4 tasks (which believe me are all easy and quick to do):

a) Become a follower to the Posh Designs Scrapbook Store's blog.

b) Join the Posh Designs Scrapbook Store Interactive Community.

c) Leave me a comment at the end of each Cricut Tuesday blog post.

d) Link a project using the comment box inspired by any of my Cricut Tuesdays post

Each of the above requirements you do equates to 1 ballot, therefore if you complete all 4 requirements; you get 4 ballots and increase your chances of winning.

Please note that requirements are to be done on a weekly basis to qualify for that week's prize as there will be no carry over in ballots.

3) Prizes will be awarded in the following manner:

October 13th - Your chance to win 2 Cricut 6x6 Stamp Sheets with Folders plus a $10.00 PDSS gift certificate.

October 20th - Your chance to win 1 Cricut Storage Binder plus a $20.00 PDSS gift certificate.

October 27th - Your chance to win 1 Cricut Cartridge - Sponge Bob

Please ensure that you leave proper contact info so that we are able to reach you if you are the winner.

Each winner will be announced on the above dates and PDSS will contact the winners via email to obtain further contact information for shipping purposes.

4) Contest entries will follow this schedule:

For October 13th's prize - all ballots must be casted between October 6th to October 12th.

For October 20th's prize - all ballots must be casted between October 14th to October 19th.

For October 27th's prize - all ballots must be casted between October 21st to October 26th.

5) All ballots will be drawn by persons from the PDSS Administration Team.

6) All prizes will shipped via Canada Post using Expedited Parcel service.You will receive a tracking number but this service does not include shipping insurance. Should you wish insurance, it is an option for you at a nominal cost as per Canada Post's guidelines. For all PDSS Gift Certificates, your name will be held at store level and should you make a purchase; proper adjustments will be made. Note that shipping and taxes as applicable are extra costs and not covered by the PDSS gift certificates.

7) This contest is open to all new and current members and followers of the PDSS Blog and Interactive Community (within Canada and Mainland US) however, PDSS Design Team & Administration Members are excluded from this contest.

Thanks for stopping by! Have fun with your Halloween creations and I wish you Good Luck in all of the contests!!! Until next week... Happy Crafting ~Michelle

Tuesday, September 29, 2009

Cricut Tuesdays with Michelle

Happy Tuesday to you!

Ever have those photos where it's not perfect... Not being centred, eyes closed, blurry image, etc... Well before I scrapbooked, I would have thought these types of photos were 'not good' enough to keep nevermind to scrapbook. But when I came across this photo with my Son, SIL and myself playing in the sand - I could not resist, not making a layout. This page was created weeks ago and relates perfectly to another DT's post about focusing on subject and placing emphasis on that subject (in this case, I used an expression - mind the pun). Here's the layout below.


My hope is to have inspired you to look at a different angles when you scrapbook that 'non-perfect' photo or have other people's memories to recall with photos; scrapbook them because those types of pages can be the best stories to tell.

Thanks for looking and until next week, happy crafting!

Michelle

Tuesday, September 22, 2009

Cricut Tuesdays with Michelle

Happy Tuesday Everyone!

This week I am sharing a card project with two stories behind it. I am a novice stamper and discovered Alcohol Inks. Now to some of you these inks are not new but they were to me as I am sure to many others as well.

At first the pretty bottles and tools were unused for a couple of weeks after my purchase. In fact I asked another Community Member if we could swap because as time passed I thought I was in over my head!

I am a die-cutter, how on earth can I incorporate alcohol inks into my already established technique style?

What purpose did these tools serve me in my crafting world?

I have cardstock and patterned paper, some stamps, ink pads and markers... Isn't that enough?

Questions like those stirred in my head for days. Then my 'a-ha' moment arrived and this is what I created. And I thank that Community Member who did not swap with me; it was truly a blessing in disguise ;)

Something you may not know about me but will now is that I am a cardstock hoarder. I keep every possible inch that my smallest punch will fit in because you never know, right?

As for patterned paper, I let go of that more easily because it changes all the time. Anyhow before I digress any further, this is my experience with glossy cardstock. This was my 1st time using that type of cardstock and I wanted to use as little as possible yet get the shape & size I desired.

Needless to say after 4 tries, nothing worked. So I tried again for the 5th time and it still didn't work; my sizing was off! I even walked away from my scrap area to take a breather as I was getting so frustrated. Then it occurred to me to cut the shape in half and use the 'workable' half onto my card.

So as you can see that I was able to incorporate alcohol inks onto my project by creating a unique color palette to choose a die-cut shape from. Looking at a different angle of my die cut, I was able to create a custom die-cut within its own shape. Then mixing & matching cardstock with patterned paper; adding some ribbon and a sentiment... Voila c'est fini, my card creation.

Although my card design is simple, I was able to add interest, texture and color to create a homemade card like all other homemade cards to be unique and pretty!

I hope you enjoyed this week's post and until next time... Happy Crafting!


Tuesday, September 15, 2009

Another Cricut Tuesday Moment

Hi Again Everyone!

No it is not Tuesday of next week and yes you may have already read my recent post for this week. Though today I am really excited to share with you a card I created being inspired by the Joy Fold Card style and the Gift Explosion Box. Now if you know the name of this card style please let me know! Otherwise, I have dubbed it as my 5-sided card (not very creative, I know) or if you can think of a really cute label, please let me know!

Here are the photos below:


To create this card you will need:
  • 1- 12 x 12 piece of cardstock (preferably of at least 80lb weight)

  • 1 - 6 x 12 piece of cardstock in an alternate color to compliment the above cardstock color

  • 1 - 6 x 12 piece of cardstock in another alternate color to compliment the other 6 x 12 piece of cardstock

  • Embellishments and/or stamps as desired.


How to assemble:

  1. Score the 12 x12 cardstock @ the 4" increment then @ the 8" increment.

  2. Turn your cardstock 90 degrees and repeat the same score increments. You will now have 9 scored boxes equalling 4" squares each.

  3. Cut along each corner of the cardstock, removing only 1-3" square. As a result, you will have created a plus sign shape (see below).

  4. Fold in all your sides. Do not worry that the flaps do not lay flat as these will be trimmed and scored to allow the card to lay flat when completed.

  5. Determine your card front, that will be side 1. All other sides will be 2nd to your 4th with the 5th side being the actual interior of the card.

  6. For my sample I made my card open left to right then top to bottom (refer back to photos). There are no wrong ways to sequence your folds, in fact this is the fun part for the recipient to figure out (or maybe you if you are lucky to see their face).

  7. To ensure each side lays flat once the card has been completed you will need to trim off 1/8" off sides 2, 3 and 4.

  8. Once all sides have been trimmed, you will need to score the same above sides 1/8" in from the original score lines created in step #2. Once all those score lines are created, fold them in crisp. You will now find that your card will fold neatly and stay flat.

  9. Sides 1 through 4 will measure 3-3/4 x 4".

  10. Decorate and embellish your layering mats as desired leaving your card interior for your message.

  • Because I chose to border punch sides #1 and #3 my matting instructions are for below. If you choose not to border punch you can create your background/main mat @ 3-1/2" x 3-3/4" with your layering mat @ 3-1/4" x 3-1/2".

  • If you have chosen to use a border punch these are your matting instructions: With your 2-6 x 12 sheets of cardstock, create mats for your photos, images, journalling, etc... Each main or background mat will measure 3 x 3-3/4" and the layering mat @ 2-3/4 x 3-1/2".

  • Please note: If you choose to add thicker embellishments, you will need to increase your score lines from step #7 by 1/8" and alter your background and layering mats accordingly.

Thanks for looking and this time for real... Until next Tuesday, Happy Crafting!

Michelle

Cricut Tuesdays with Michelle

Happy Tuesday Everyone! Where ever you are reading this post I hope you are having a great start to what appears to be a glorious Fall season. Personally I am a Fall kinda of gal... Love the crisp air, change in color of the leaves and especially the Indian Summers (my favorite)! In the upcoming editions of Cricut Tuesdays I will be showcasing some Fall related projects.

For this week's project; I created 2 Mini Albums for my girlfriends as a thank-you gift for coming to my home for a weekend visit a few weeks ago. They were camera happy between fishing, boating, swimming and warm nights around the fire pit; lights were going off like crazy. These albums were a first for me to create but certainly not the last; they were so much fun to do!

Check out the album covers below:


For the pages on each album, I used the Mini Monograms cartridge. To give weight to each of the pages and in-between them, I recycled cereal boxes! Additional pages can be found on my blog located via the community site.

You maybe a follower of this blog, and you may have noticed that my style is pretty simple! I am a die-cutter gal who adores her Cricut. I make no bones about that. Being only a scrapbooker for just a mere 18 months now and a busy SAHWM; I am finally breaking through my usual creative process and am including other techniques you see in other of the DT projects such as stamping, embossing, inking and of course layering.

To create these minis, I scraplifted some concept ideas from a vblog I follow on YouTube! So as you can see I take inspiration from every source I possibly can. As a result of all that inspiration and absorption; these Mini Albums I created are ones that I am really proud of!

To be honest... I really don't want to give them away (just kidding... sort of). Mel and Dawn be on the lookout; these are for you!

Thanks for stopping by and until next Tuesday, Happy Crafting :)
 

Blog Design By Sour Apple Studio © All Rights Reserved.