


Happy Tuesday everyone!
This week we will be focusing on cards as my family just celebrated my Son's 2nd Birthday! My intention was to make the biggest card ever on my Cricut (with matching envelope of course) and create a super easy card ready in mere moments.
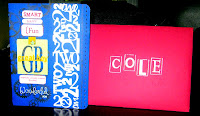
Well to be honest the card is not as big as I had anticipated and when making the card I used alot of simple elements however I layered so much therefore the assembly took longer than I planned. In the end though my Husband and I were so pleased with the results; this card was the talk amongst all the family over dinner.
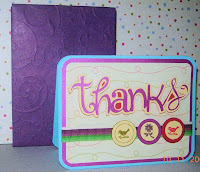
The second card I created is a Thanks card to acknowledge the wonderful gesture and gifts my Son received (more like spoiled) from our family and friends.
I used 2 cartridges for these projects: Beyond Birthdays & Graphically Speaking. If you have not already own these cartridges; may I suggest that you do.
Here's why...
First, Beyond Birthdays is chock full of useful and everyday sentiments to cover off most occasions plus there are icons to go along with each sentiment that can be layered. And speaking of layering this cartridge has all the 3 creative features (IMHO) to make layering easy yet stand-out on your projects whether it be a card or a scrapbook page.
These 3 creative features I am referring to are: standard, shadow and shadow blackout.
Let me briefly explain the difference:
- Standard: the set image as is when you press its key (same between non-shift & shift keys).
- Shadow: the Standard image designed slightly larger creating a 'shadow' when you nestle the standard cut image on top of this type of cut.
- Shadow Blackout: the Shadow image designed with filled in spaces creating a blackout effect.
This cut will nest exactly with its corresponding Standard creative feature layering on top. When using all 3 creative features in this manner makes any die-cut pop off a project even when using basic, plain cardstock. Plus having 2 different card designs (square and rectangle) standard to any cardmaking project these days with coordinating envelopes; you will be set to create any card quick and easy!
Secondly I personally adore the Graphically Speaking cartridge and used it for my Son's Birthday card is because of the numeric graphics as well as the versatility of its captions and quotes. This card is filled with with so many of those options plus a variety of shapes and icons that you can easily mix and match to your hearts content. And when you can mix and match your die-cut elements; the possibilities are endless!
Now keeping all that in mind, here's how to re-create these cards to suit your occasion.
Birthday Card:
Ensure your settings are set to '24' (aka mat size 12 x 24) on your Cricut machine. How to do this is to press the Settings button and push OK until you reach the Mat Size option. Once you reach that option, use your arrow key to change the mat size then press Settings to exit. You will now have to turn off your Cricut machine and turn it back on to reset the mat size (wait a few seconds in between). You can tell if you are successful when your mat size icon (located on the bottom left of the LCD screen) shows '24'. If not, repeat the above steps and try again.
- Insert a 12 x 24 sheet of cardstock into your Cricut.
- Press your Fit to Page button on.
- Select your envelope shape as desired (my card I chose the rectangle envelope option).
- Press Cut. Remember the size your Cricut machine will cut at as you will use this same size to cut your coordinating card at.
- Once your envelope has finished cutting; insert your 12 x12 cardstock into the machine and press the coordinating card to the envelope shape previously chosen.
- Ensure your Fit to Page button is off.
- Re-adjust your size to the number memorized from step #5. Then press Cut.
- Score, fold (and adhere where necessary certain folds) your envelope and card.
- Set your size dial at 3-1/2". Cut the 'GB tag' (Image14).
- Cut the 'great boy with fastener' (Imag14-s) in another color piece of cardstock/paper.Layer and adhere pieces together.
- Cut the '2' numeric graphic (Image42) using the Fit to Length button. Adjust size dial to 8-3/4" prior to.
- (optional) Border punch the cardfront opening as desired for a decorative touch and interest.
- (optional) Decorate your cardfront, stamp images that suit the occasion as desired. This can be a mix of words and/or shapes.
- Adhere your cut pieces as desired onto your cardfront.
- Heat emboss a greeting to the recipient (optional) or use white StazOn ink or white Pigment Ink - use whatever you have on hand. For my project I used white embossing powder.
Now onto the next card creation. Now because I has to mass produce these; I chose a to use a simple design using as many colors and textures as possible to achieve that WOW factor. I hope you will agree. For this card I used cardstock that has a pearl sheen to it. These stacks are from DCWV and there are two here I highly recommend, Hippie Chic and All About Girls.
Now let's get started...
Thanks card:
This card is now complete!
I hope you enjoyed these two card projects this week. Don't forget to enter the Posh Designs Card Sketch Challenge Contest. This is week #2 and there is a fabulous prize to be won!
Thanks card:
- Take a 8-1/2 x 11" cardstock and cut in half. Score each card in half creating a standard A2 size card.
- Cut a piece of solid cardstock to 5-1/4 x 4". Set aside.
- Cut a piece of patterned paper to 5 x 3-3/4". Set aside.
- Using the Beyond Birthdays cartridge; cut the word 'Thanks' using all three creative features.
- Set your Fit to Length button on with your size dial set at 3-1/2". Press cut using the Shadow Blackout creative feature first. Remember the number the cut will be set at.
- Turn off your Fit to Length button and cut the remaining layers with the other two creative features. Layer and adhere all pieces together. Set aside. Choose papers that coordinate with your patterned paper for a cohesive look.
- Adhere the cardstock pieces cut from steps #2 & #3 together and layer a piece of ribbon on top.
- Adhere 'Thanks' onto the card as desired (optional, use 3-D dimensionals to adhere).
- (optional) Stamp images onto cardstock and adhere them onto cardfront as desired. For my card I used small images and then a circle punch to ensure I got the same cut shapes each time. Yes it is okay to use punches with your Cricut designs. The Cricut Police will not come after you, ha!
I hope you enjoyed these two card projects this week. Don't forget to enter the Posh Designs Card Sketch Challenge Contest. This is week #2 and there is a fabulous prize to be won!
Next week I will show you an interesting way to use metal onto your card projects. It may not be what you think and it may lead you to see this ordinary object in a whole new light.
Until next week... Happy Crafting!
Michelle
Until next week... Happy Crafting!
Michelle


Love all the cards. You are rockin' girly!!! :)
ReplyDeleteGreat Cards Michelle, GS is one of my top 10 favs.
ReplyDeleteAwesome cards Michelle!!!! :)
ReplyDeleteI love creating cards but getting the card and envelope to fit is the hardest thing to do...thank you for explaining it for all of us!
ReplyDeleteHugs!
Cassandra